Wednesday, February 25, 2015

Herbal Cough Syrup

Whether it is Spring fever or Winter flu, there is always a good reason to keep something to help with coughs and sore throats around, you never know when they will sneak up on you. I wasn't sick for over a year and suddenly, in January, fell victim to this crudy crud that lasted weeks. As soon as I thought it was done, I feel something else coming on. Hoping it is the yearly Spring Allergies (which I will post about in the near future) but it feels like it is more than that. Lucky for me, this week in my HERB 502 class at ACHS we are making this herbal cough syrup for our practical and I am sharing all the goodness with you. Just a reminder that you can get herbal kits through the ACHS apothecary store with the herbs you need to do this recipe and few more.

You will need:

  • one ounce licorice root
  • one ounce marshmallow root
  • one ounce slippery elm bark
  • one ounce flaxseed
  • 4 pints of water
  • one pound of all natural raw honey or a pint of molasses
  • a half gallon jar
  • a small pot 
  • a large pot
  • a mesh bag or cheese cloth
  • four 14 ounce dark bottles with lids or corks (I used old Kombucha bottles)
  • labels
You will start by adding the one ounce of licorice root to the small pot with one pint of water. Heat it on medium high until it boils, be careful, it foams and will quickly overflow from the pot if you don't turn the heat down to medium low as soon as it boils. Let it sit and simmer down about 30 minutes, reducing the liquid about 1/4. 

While that is cooking, add the rest of the herbs into your gallon jar and pour 3 pints of hot water in. I tried putting the herbs in my handy infusion strainer but, the slippery elm has it's own pectin in it and gels up, making it hard to strain through. I found just pouring all the herbs in works better. 

A little about the herbs. Licorice Root is known for its expectorant properties for use with upper respiratory infections and bronchial catarrhs. The extracts have shown anti-bacterial and anti-fungal properties. Marshmallow is an effective demulcent that coats the throat and has anti-inflammatory properties. Slippery elm will not only treat inflamed mucus membranes of the bronchial tubes, but it will absorb excess mucous from respiratory conditions. Flaxseed is also a demulcent that helps to lubricate mucus membranes and sooth inflammation. 

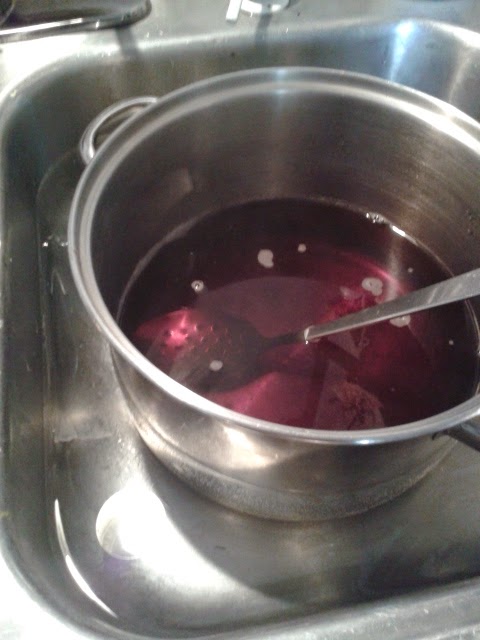
Ok, so now that your decoction is ready, you will pour the liquid through your strainer, into the half
gallon jar so it can infuse with the other herbs for 20-30 minutes. Notice how the herbs layer while infusing? While this is happening is a great time to eat lunch or clean up your messes. Get ready because here comes the fun part. 

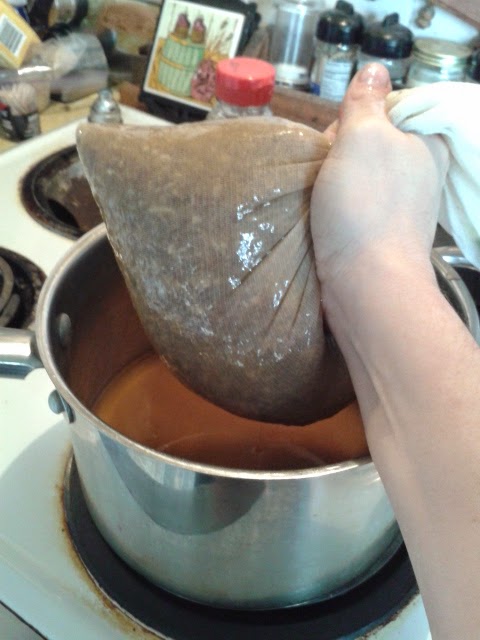
The demulcent nature of these herbs means that they are really SLIMY when they are wet. Like, forget your coffee filter, forget your infuser strainer, I ended up using those nylon reusable produce bags you get from the store in the produce section and putting that inside a large pan and pouring the whole half gallon jar into it. Wait until the infusion is warm enough to be handled, but not too cold. You will have to squeeze and milk the liquid out. Did I mention how slimy it is? It took about 10 minutes of squeezing and oozing the slime out. I usually put my spent herbs in my worm composter, but this time, I put them in the trash, I know... not very nice, but I was afraid what it would do to the worms. 

After you have successfully milked out all the liquid and disposed of the slimy leftovers, you can now pour in your honey or molasses. I changed my mind halfway through and went for the Oregon Meadowfoam raw honey at the health food store that was $9 for a pound. 

Once you have added the honey and stirred it all up, you can start bottling it in your brown jars. I use my tincture funnel, holding the bottle over the pot so I didn't make a mess, and using a measuring cup to scoop the very thick liquid into the jars. cork them, label them and store in a dark area or in the refrigerator. 

This cough syrup has a light sweet taste that doesn't taste like licorice. I HATE the taste of licorice, seriously, I avoid it at all costs, but this doesn't taste like that at all. You can use a tablespoon three to four times a day as needed for sore throat and cough. I am going to be using it the next few days because I am feeling like I am coming down with something. Some alternative herbs you could use in this mix would be something for immune function like elderberry or Echinacea, something to help you sleep like Skullcap, or my personal favorite all around great herb, Lemon Balm which also has antiviral, antibiotic properties and is a light sedative. For a day time cough relief potion, adding some vitamin B and C to it will help with energy. 

Good luck and happy sliming!

Friday, February 13, 2015

Kombucha

The Elixir of the Gods!! Kombucha is all over the stores, in all shapes, sizes and flavors. it is delicious and can become a good habit, a reward at the end of the day, give you a euphoric feeling and help with health issues from digestive problems to pain relief.  Some studies show the possibility of a detoxifying effect that may reduce cancer cells. Other studies provide evidence of Kombucha helping to treat diabetes! When ever we have a bout of digestive upset, feel the oncoming of a cold or when my friends are drinking alcohol and I don't want to, Kombucha is what I reach for.

Since I started brewing my own, I much prefer mine to store bought, but I do really like the fizzy of the store stuff and I haven't mastered that part. There are some challenging aspects, like changes in the seasons that will make the temps in your house fluctuate and if you want to experiment with different flavors or teas, finding the right ones and the right recipe can take time. But I do find it rewarding. Another challenge I have is where to send the SCOBYs that I usually end up saving because I can't throw them away.

from https://naughtynaturopathmum.files.wordpress.com/2013/04/scoby-collage.jpg 
So here is an easy recipe that is basic and can get you going. First, you want to start with a couple of half gallon Ball Jars, run them through the washer and make sure they are nice and clean. You will need to get a SCOBY from someone, (or purchase a kit here) or use your favorite Kombucha from the store. If you start with store bought Kombucha, it may take a little longer to get established. You will also need some black or green tea bags, sugar and filtered water as well as a couple of paper towels and rubber bands.
See how thick my SCOBYs are in that jar? That is the result of making Kombucha last fall and not harvesting it. They get HUGE. I lost most of them to mold though, so it is important to keep the brewing in an area free of mold spores and make sure all the utensils and water are clean. 

So you will start by gathering these materials and boiling 3 qts of filtered water. I used water from my refrigerator filter. Bring that to a boil in a big pot and then put 3-4 tea bags in to steep for 15 minutes. Remove the tea bags and add 1 cup of sugar (you should use all natural, organic sugar, but regular, white, grain sugar is fine). Stir it up to make sure it gets nice and dissolved.


 The next thing you will need to do is let that tea get to about room temperature because you will kill the SCOBY if you put hot water on it. I like to set my pot in the sink full of cold water to speed this part along. After all, you don't want your pot of tea sitting out in the open for too long, it could collect mold spores this way.

 After the tea has cooled down to about room temperature, you can pour it into the Ball jars and add one cup of Kombucha and a SCOBY. If you don't have a SCOBY, you should add more Kombucha. Next you will put a paper towel over the top and secure it with a rubber band. this will help keep things from landing in your jar and allow oxygen to help the brewing process.  There are many kinds of containers you can use for brewing your Kombucha. I prefer this because it is easy and cheap and makes just enough for my house and usually some to spare for friends.  

In the picture below, I have just poured in the tea and placed the SCOBY. That SCOBY is now the Mother and a new one will form on the top of the brew.
 
You will then set the jars in a place where they won't be messed with a lot and let them sit for about a week. You should get some pH tester strips and test it to see if it is at about 2.7-3.2. You can also take a small amount out and taste to see if it is where you like it. If you let it sit for too long, it will become vinegary and then you will have to dilute it to drink it. If that happens, I usually just brew some more tea or put it in juice to drink. But I prefer it to be sweet. So then, using glass jars with lids (I save my Kombucha Jars from the store) use a funnel to help gently pour the Kombucha into those jars, leaving very little space at the top, and secure the lids. Let them sit on a shelf for about 5 days and then put in the fridge and enjoy! Celebrate when you open lids and get fizz!! Even if it doesn't fizz, it is still yummy.

There are loads of other blogs and websites with information that you can browse through and see what works for you. Just know, as with any kind of "natural remedy" there are many variables and factors that go into making it just right and how it effects you when you use it. You will have to decide what works for you and what doesn't and when you find that right taste and effect, keep doing it. I recommend keeping a journal of how you brewed and the time and pH levels and average temps for the week and see what works, adjust for seasonal changes and have fun with it. DO NOT drink Kombucha from a brew that has grown mold. Otherwise, listen to your body and it will tell you what you need. 

Wednesday, February 11, 2015

Irritated Skin Treatment

This morning, I was once again having some computer troubles so while I was waiting for that to resolve, I decided it was time to make the irritated skin treatment. I had previously written down the instructions and gathered all the ingredients together. I poured the Yellow Dock and Burdock in the pan and then put 2 oz of water over it, quickly realizing that there was no way that was going to work. I had read the directions wrong and then poured the appropriate amount of water in and heat up the brew, stirring occasionally while it simmered. A while back, I used to make decoctions with TCM roots and herbs provided by a trusted practitioner, we used to use one cup of water to one ounce of herbs/roots and boil it down. I remembered that process, how the herbs smelled, tasted, how I used to pour honey in it to try and drink it down as fast as possible and how even though when I first started that brew I hated it, eventually I ended up craving it because I knew it was good for me. These docks roots smelled wonderful while they were simmering on my stove.


The biggest challenge I have with decoctions is knowing when it is finished, when there is enough of the water cooked out of it to have the right amount.
After I decided it was done, I poured it out into my glass measuring cup that was lined with a coffee filter, smashing the roots left over in the pan to get all the fluids out. There was about one cup/8 ozs of decoction.


 I placed the Plantain into my infuser set in a pint jar. Then I poured the decoction over the Plantain and then topped it off with hot water. I let it sit for longer than the instructions called for, probably around 2 hours. The instructions I have followed for making infusions has been one ounce herb to one quart water and sit for 4 hours, so these instructions are different than what I am used to.


I took the finished infusion and put a lid on it after removing all the herbs and disposing of them in the worm composter. The jar is in the fridge. I plan on using it as a hair rinse. I have dread locks and tightened them this morning so my scalp is pretty sore and irritated. My husband also has a dandruff problem that seems to get no where. We have used an antiseptic rinse on it before that seemed to help but it didn’t fully go away. He has used over the counter shampoos, like T-Gel (which the active ingredient in it is coal tar, seriously, why on Earth do people do that?) and tea tree shampoos. So I will update my post later this week with the results of using it on our heads. I think I will warm it up and dilute it a little to make sure we get coverage. 

Here is the recipe but on step one, it should say 2 pints water added to the 2 oz of herbs.... 
Here we go!!

As my education into Herbalism and Nutrition takes off, I want to document the recipes and day to day activities of my kitchen and garden and life dedicated to utilizing the gifts of the Earth, in harmony with the cycles of the seasons, the moon, and my growing family. Here is where my freetime created from dumping Facebook is going to be expressed. If you are a FB feind, I highly recommend freeing yourself and kicking it like a bad habit!!

Please enjoy the recipes and information shared as I move through the Masters of CAM degree program at ACHS.